Jobs & Quotations
Creating a Job (Preferred Method)
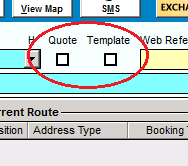
Open the Job Window and select the type of job you require (Job, Quote or Template) | Creating Jobs, Quotations and Templates are all done in the same way, to select which type you require simply tick the appropriate box at the top as shown in Fig 2 |
Fig 1 |
Fig 2 |
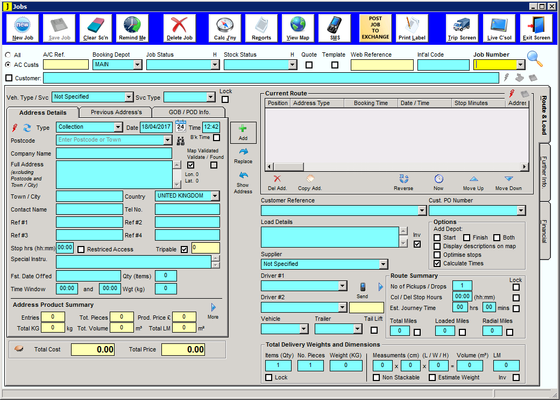
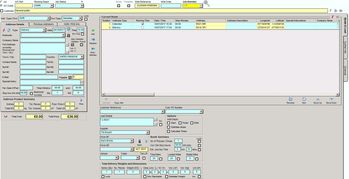
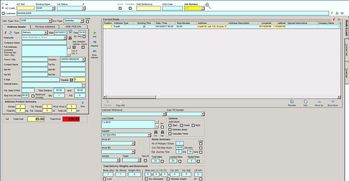
Start by selecting the customer that you are booking the Job for, clicking in the Customer textbox will bring up a list of current customers, as you start typing the textbox will fill with a suggested name, the more of the name you type the closer it will be to the customer you want. When it shows the full name, you can press enter to populate this textbox. Alternatively if you see the customer in the list you can double-click on the name to select it. N.B. if this is a Quote for a new customer, that is not in your Customer list, then you can enter a customer name without selecting from the list, however if you do this on a Job or Template then Journease will not allow you to save the Job with an invalid customer name. The Booking Depot at the top should automatically display your Default Depot, however if you are booking this Job from a different depot this is where to change the details. The remaining set up can be done in any order as no changes will be made until the Job is saved. For the purposes of this instructional we will take each section as it shows on the screen. The left-hand side of this window is where we enter the information for the Job, on the right at the top is the Job Schedule window that will show the Job destinations as we enter them giving an overview of the whole Job, and below this we have entries for the customer’s reference and Purchase order, Supplier/driver and Load specifications. | |
| 1 | Enter Customer Name |
| 2 | Under the Address Details section select Collection or Delivery from the drop-down box (by default this will show Collection, after the first address is completed and entered it will default to Delivery) – other choices in this drop-down box are:
|
| 3 | Enter the date and time that you require the Job to take place (this will show the current time and date by default) |
| 4 | Enter a Postcode for the Col / Del address either from the drop-down box (this will show a list of previously used Col / Del addresses for the chosen customer), or a new Postcode. Clicking on the Previous Addresses Tab will also list all previous addresses used, selecting one from this list will automatically fill in the details and move the address to the current route list. N.B. To add the customers address in full you can click on the blue arrows to the left of the Type field which will automatically populate the address with that taken from the customer details page. |
| 5 | Fill in the textbox for Town / City (steps 1-5 denotes the minimum requirement for a Job creation). |
| 6 | If you are signed up to the Loqate (formerly postcode lookup) service you can click on the binoculars to lookup the remainder of the address (this will use 1 credit per search), otherwise fill out the remainder of the address and contact details if known. |
| 7 | To the side of the Full Address textbox are two tickboxes for Map Validation, If the postcode entered is validated by the map search (automatic) then these will both be ticked, If the postcode cannot be validated then the Found tickbox will remain empty and the Lon. Lat. Number will be 0, this means that the postcode entered is invalid and will need to be checked. |
| 8 | Next, we enter the product information for the Col / Del. This can be done in one of two ways:-
|
| 9 | Next we click on the Add button (little green cross) to add this Col / Del address to the Current Route (doing so will clear the Address Details section and default the Type box to Delivery) |
| 10 | Repeat steps 3 to 10 for the delivery, you can continue repeating steps 3 to 10 with collections and deliveries until the Current Route is complete. |
| 11 | On the right-hand side of the window input the Customer Reference and Purchase Order Number if they are required. |
| 12 | Under the Options section are several tickboxes that allow you to adjust how the Job will be calculated.
|
You will have noticed that there is no price for the Job that we have created, this is because we have not assigned a Vehicle, Supplier/Driver, or pricing matrix to the job (unless you have a default matrix assigned to the customer). Let’s add a simple costing to this Job. The cost of a Job is determined by the Vehicle Type and Service Type used for the Job. The Hierarchy of costing can be seen in How Jobs Are Priced, for this example we are going to use the basic Vehicle settings for Small Van that we have set up in Vehicles & Services. | |
Fig 3 |
Fig 4 |

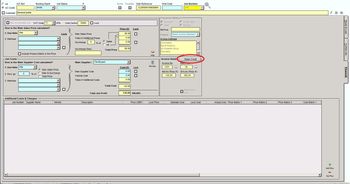
Using the Job that we created above (if you have cleared the screen then you can find the Job again by clicking on the Job Number drop-down box in the top right of the screen and selecting the Job from the list) we can change the Veh. Type / Svc drop down box on the left-hand side above the Address Details section (Fig 3). For this example I have selected Small Van with nothing in the Svc Type drop-down box. |
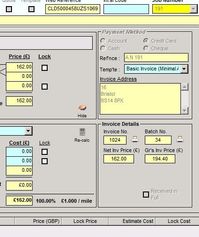
Fig 4.This Picture is taken from the Vehicle Types and Services window and shows that for the Small Van we have a minimum price of £15 and a mileage price of £1.50 for Mile Rate and £1.70 for Mile 2 Rate. If we now click on Calc J’ny button Journease will calculate a price based on this Vehicle, to see how this is calculated we can click on the Financial tab on the right-hand side of the Job window (Fig 5). |
Fig 5Here we can see that we Use Rate “Mile” (which is the £1.50 rate shown in Fig 4). Journease will calculate the cost of the Job simply by multiplying the rate by the number of miles travelled, it will then check to ensure that the price is above the minimum stated in Fig 4 (£15), if the price was below this then it would use £15 (N.B. in this tab 2.Matrices values will override the Use Rate value). As pricing of Jobs using Matrices is a major part of the Journease experience we will cover it in more depth in its own section. Our Job now has a price associated with it and is almost ready to roll. All we need to add now is a Supplier / Driver who will carry out the Job. |
Fig 5 |
Fig 6 |
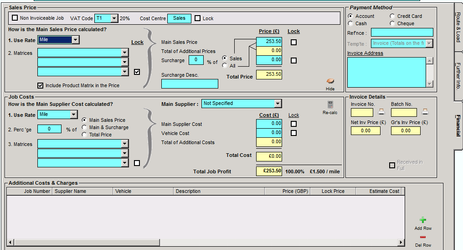
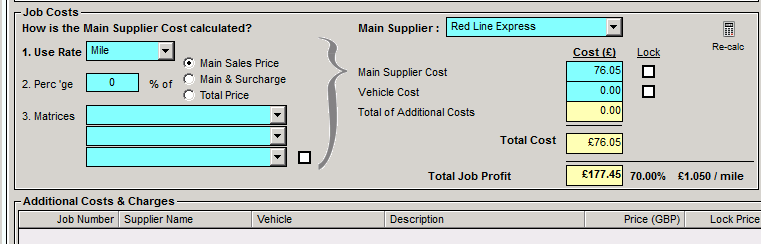
Go back to the Route & Load tab and in the lower right section select a Supplier from the drop-down box, (Journease will only list Suppliers that provide the required service – in this example Suppliers that provide Small Van). Once a Supplier has been selected, any costs associated with that Supplier will be added to the Total Costs box next to the Total Price box. If we now look back at the Financial tab we can see the costs for the Job have been added to the lower section and Journease has also calculated the profit for this Job. (Fig 6) |
ChecklistOur Job now looks ready to go, let’s do a quick checklist:-
|
Fig 7 |
|
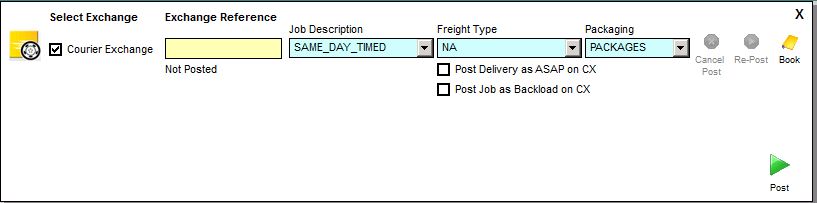
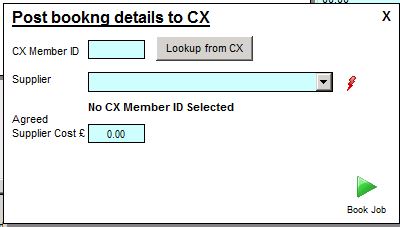
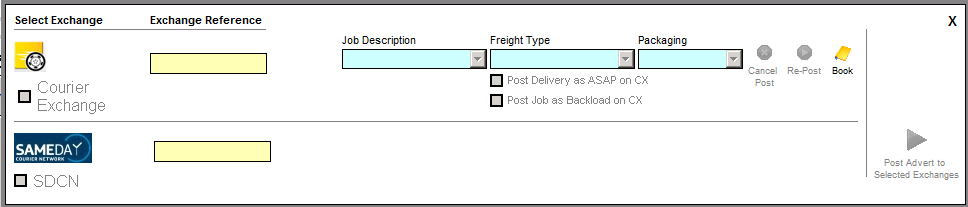
Alternatively we can post the Job direct to the Courier Exchange (Membership to CX is required and details can be entered in LOOKUP>ADMINISTRATION>THIRD PARTY VENDORS>COURIER EXCHANGE) Once you have entered all the details for the Job and have saved it as a new Job, instead of selecting a Supplier, we can click on the Post Job To Exchange button at the top of the Job Screen. This will open a pop-up box (Fig 7) where you can tailor the job description and freight type, then click on the green Post arrow to post it to the exchange. This will post the job details to the CX with minimal information, for example it will only show the first part of the postcode for each address. You will usually start getting replies quickly with offers to do the Job. Once you have found a supplier on CX that matches your needs you can re-open the Job (if you have closed it) and click on the Post Job To Exchange button again to bring up the pop-up box, this time we click on the Yellow Book Icon in the top right of the pop-up. This will open another pop-up (Fig 8) where we can enter the CX Member ID of the courier that we have agreed with, we can add the agreed supplier cost and then click on the green Book Job arrow to finalise the details and save the CX member against this Job, this will email a confirmation to the CX member with full details for the Job. If this CX member is new to you then by clicking the Book Job arrow his details will automatically be added to your suppliers in Journease, this means that in future if you wish to use the same supplier again you can select him from the Supplier drop down box either on the Job screen or in the pop-up shown in Fig 8. | |
N.B. if you are a Journease Mobile user then you can now send this Job to the driver’s mobile phone for him to accept or decline, this is covered in more detail in the Journease Mobile User Guide. If we now click on the Live C’sol button at the top we will be taken to the Action Screens> live console window where the new Job will appear at the bottom of the list. |
Creating a Job for a NON-Account customer
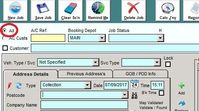
The steps for creating a Job for a non account customer are the same as for an account customer with the following differences: | |
|
|
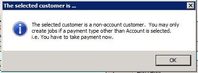
| When you have completed filling out the Job screen and clicked on Save to create the Job you will be presented with the following warning messages. Click OK to move to the next screen, this will change the Job Screen TAB to the Financial Tab ready for payment details to be added |
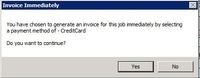
| Depending on which Radio Button you have chosen as payment method this Warning message will display with the end of the message stating -CreditCard/ -Cash/ -Cheque Clicking No will prevent the Job from being saved and return you to the Financial Tab ready for payment details to be added Click Yes to take you to the next message |
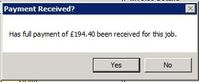
| This is asking if you have already received payment for the Job - the amount will show the price for the Job you have created Clicking Yes will take you to the next message and will add a line to the bottom of the Invoice to say that it has been paid Clicking No will take you to the next message, but no line will be added to the bottom of the invoice |
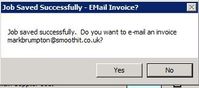
| This message shows that the Job save has been successful, This will display if an Email address has been set against this customer for Invoicing, If no Email address has been added then it will skip this message and go directly to the next Click Yes to send an invoice to the registered address with the Invoice attached Click No if you do not wish to email the invoice at this time |
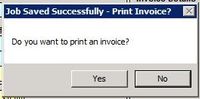
| This message will appear next to allow you to Print the invoice Click Yes to Preview and Print the Invoice Click No to skip Printing (N.B. the Invoice can be reprinted later) |
| Once the Invoice has been Printed / Emailed / Left you will see the windows in the Financial Tab change to yellow to show that they cannot be altered. There will now be an Invoice Number associated with this Job, to reprint the invoice click on the Printer icon next to the invoice number. Reprinting and Re-Emailing of this invoice can also be done from the Finance>Sales Invoices Window by entering the invoice number in the top right section and selecting Invoice or Re-Email. Once Payment has been received for the invoice this can be registered by going to the Finance>Record Invoice Payment Window and entering the invoice number and payment details. Note that once the Job has been saved it will appear on the live console as a normal Job and will be run as such even if payment has not been received |
QuotesTo Create a Quote first select the relevant tickbox (see Fig.2 above) For Quotes the process is the same except when we save it as a quote it won’t be sent to the live screen but, instead, will be saved with a quote number not a Job number. |
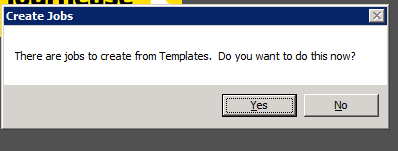
Template and RemindersTo Create a Template first select the relevant tickbox (see Fig.2 above) For Templates the process is the same except we would not necessarily include a Supplier / Driver as this may differ each time the template is called. When we save it as a template it will not be added to the Live Screen and will be saved as a Template. Templates are used when creating the same Job on a regular basis, for example with the above Job if we were going to do this exact Job every Monday then we would first save it as a template, it is advisable to give this an Int’al Code in the top right of the Job screen so that it will be easily recognisable when making changes in the future. Next, we can click on the Remind Me button to set a reminder for every Monday, this means that when you log onto Journease on a Monday morning you will get the message shown in Fig 7.. Selecting Yes will take you to the Action Screens>Job Reminders>View Current Reminders window (Fig 8) where you can select which templates you wish to process (turn into Jobs). This will only show the Templates that are due on the date specified at the top, Templates can be processed up to a week before the start date of the Job. Tick the tick box next to the Template that you want and click Cr’te Jobs, this will add a Job Number to the 4th column of this list, this Job can then be viewed in the Job Window where you can follow the checklist before pushing it to the live screen as we did when creating a new Job. You can change the reminders for a specific Template by opening Action Screens>Job Reminders>Maintain Job Reminders where you can change the reminder days, or weekly to Monthly or delete the reminder completely (note this will delete the reminder NOT the template). Templates can be used without the reminders, simply save the template as normal but don’t click the Remind me button, when you wish to run a Job from the Template, open your Job screen, tick the Template tick box and then select the Tmplt Number from the drop-down list at the top right of the window. | |
Fig 7 | Fig 8 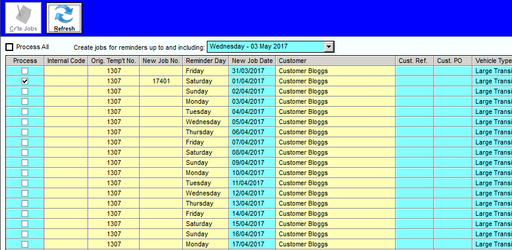 |
Version Updates
v6.6.556
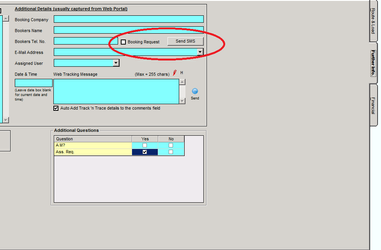
| Version 6.6.556 has added a new button to the Further Info. Tab of the Jobs & Quotations screen (see image), clicking this button will allow you to send an SMS message to the customers number entered into the Bookers Tel. No. TextBox to say that the Job has been booked. NOTE:- you will require an essendex account to be able to send SMS messages through Journease. the details for your account can be entered in the LOOKUP>ADMINISTRATION>THIRD PARTY VENDORS screen. |
v6.6.585
Fig 1 |
Fig 2 |
Fig 3 |
Update 6.6.585 has brought a new way to create a Credit Note from Jobs that have already been invoiced. On the Job screen open a Job that has already been invoiced, for the company that requires a credit note (Fig 1). There are various reasons why you may wish to create a credit note for example if you have invoiced the wrong company for this particular Job or if the amount invoiced is different to that originally agreed. Once you have the job open, navigate to the Financial Tab and click the Raise Credit button (Fig 2). this will create a new Job with the exact details of the old but this time the finances will show a credit as opposed to a price (Fig 3) | ||
v6.6.590
|
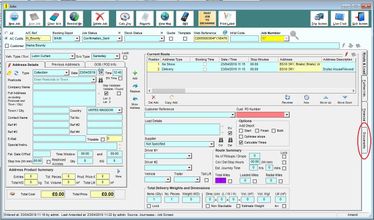
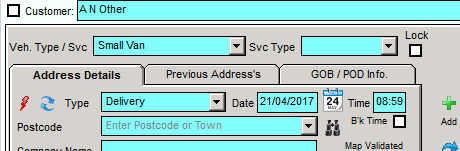
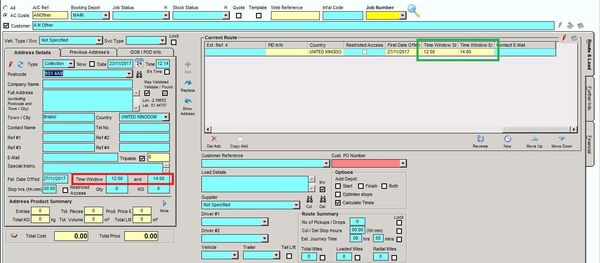
Update 6.6.590 has brought a change to the job screen, adding the option to set a time window for collections and deliveries. When entering your job details instead of entering a specific time for the address, you can now add a Time Window at the bottom of the Address Details section (Fig 1 RED ). When the address is added to the Current Route scrolling along to the end of the address will show the time window details (Fig 1 Green ). This can be used to set specific times that the address can be accessed if the criteria is required by the customer, and is included in the Job Details that are posted to the Courier Exchange if you are using this system. |
v6.6.708
| 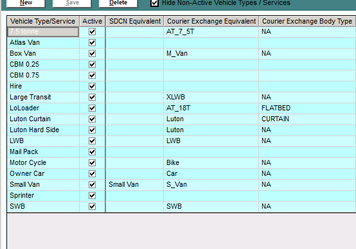 |
| Update 6.6.708 has brought an integration with Same Day Courier Network - this can be found on the pop-out window when you click "Post to Exchange" and works in a similar fashion to the Courier exchange (see above) NOTE:- You will need to add equivalent vehicle types in the Vehicle Types & services window for SDCN. At present the integration will allow you to post your Job to the SDCN however you will need to manually add the supplier when you have an agreement in place. We are working closely with SDCN to bring more detail to this feature and these will be included in future updates as they become available. | |
|
|
| Another addition is the ability to select whether or not individual tracking notifications are visible to the customer, This works in conjunction with the Delivery Booker tracking pages and will display the items that are set as customer visible. To view the tracking information, from the job screen select the Further Info tab on the right hand side, then click the H above the ad-hoc tracking message box, you will now be able to see the tracking messages that have been given for this Job and can select those that you wish to make visible to the customer. | |
v6.6.748 82746
Fig.1 |
Fig.2 |
Fig.3 |
Fig.4 |
Fig.5 | |
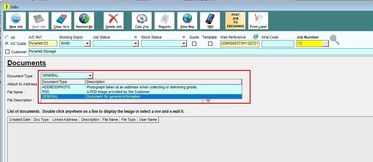
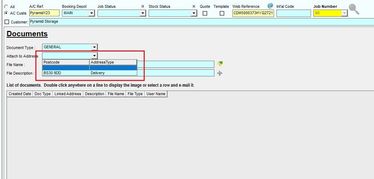
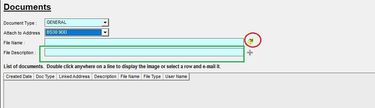
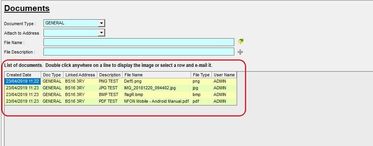
DOCUMENTS tab Another new addition to the Job screen is the Documents Tab, which allows you to upload images directly into Jobs (Fig.1). If you cannot see the Documents Tab, then please contact Journease Support to have this feature switched on.
| ||