Journease Online Delivery Booker
- Mark Jason Brumpton
- John Fryer (Unlicensed)
- lorraine@journease.co.uk (Unlicensed)
Allow your customers to book Jobs and get Quotations directly through the internet. This Journease add-on allows your customers to log into a web portal to book Jobs and receive quotes directly, this can be modified to match your company's colour scheme and incorporates your company logo. If you have SagePay set up for your company it can easily be added to allow new customers to get quotes and pay for Jobs without the need to log in. |
|
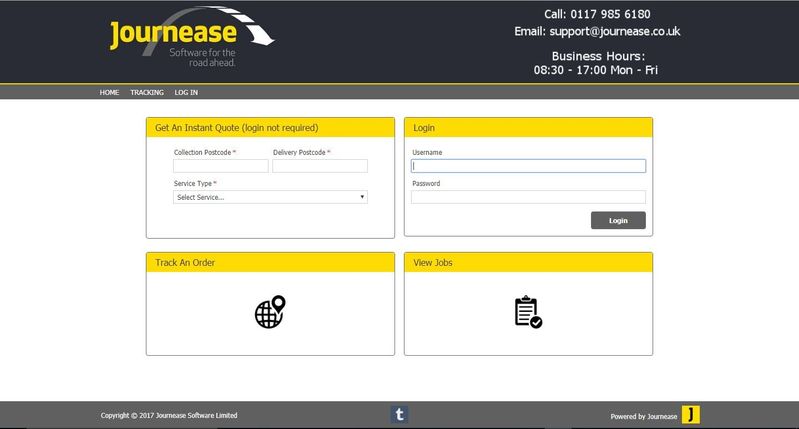
| This is the Instant Quote Widget and is an optional add-on for Journease Delivery Booker. To have this option available on the main screen you will require an online payment scheme to be set up so that customers are able to pay immediately for Jobs created through the Widget. (At present we only provide connections for SagePay), Registered Account customers are still able to get Quotes, Track parcels and Book Jobs without the Widget by logging into their account. |
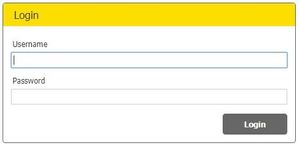
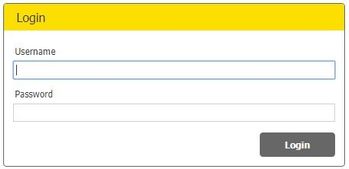
| Once your customer is registered for Journease Delivery Booker they can sign in here using their given username and password. Registering a customer is covered in more detail below. It is worth noting that you can have the ability for "On The Hop" registration to be turned on so that customers can register themselves direct from the online site. To have this feature turned on talk to one of the Journease staff. However, we only recommend using this if you have SagePay set up to avoid Jobs being booked without payment for non account customers. |
| If a customer has a Job booked with you, they will have received a confirmation email with a tracking number. Clicking on this box will open the Tracking screen where they can insert their tracking number and get information on the whereabouts of their package. (see Job Viewing and Tracking below) |
| Customers can click on this Box to view a list of Jobs that they currently have in the system. This will first take them to the log in screen as log in is required to identify the customer. (see Job Viewing and Tracking below) |

After Logging In:
| Once logged in you will see the same boxes for Quotes, Tracking and View Jobs with some additional boxes below. Note these can be switched off on a customer by customer basis, please ask Journease Support for options. Clicking this box will take you to the Job booking screen where you will be required to fill out information for the collection address and the Delivery address. |
| Clicking this box will also take you to the Job booking screen. However, the delivery address will automatically populate with the details of the customer that is logged in. |
| Clicking this box will also take you to the Job booking screen. However, the collection address will automatically populate with the details of the customer that is logged in. |
Job Booking
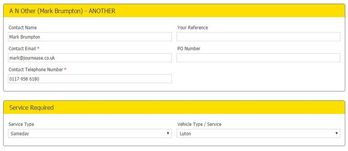
| The Top Section of the Job booking screen allows you to check your Company details and add details like Job reference and PO Number The next section is where you can select the Service Type and Vehicle type. The choices from the Drop-Down menus are set up from within Journease (see Journease configuration below). |
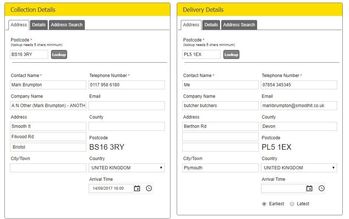
| The next section allows you to enter the address details for the collection and delivery. Note that if either the Delivery To my Location or the Delivery From My Location boxes were used then one of these sections will have been automatically populated and will just require checking to make sure that the details are correct The minimum required information to create a Job is Postcode, Contact Name and Telephone Number as shown by the * symbol, however it is advisable to give as much information as possible. The Details Tab will allow you to enter any special instructions for the collection/Delivery e.g. deliver to back door If you are unsure of the address then you can use the Address Search Tab to perform a postcode lookup, this option will only be available if the logged in customer has been granted permission to use Postcode Lookup, this can be set in Journease (see Journease configuration below). N.B. this will use one of your Loqate Tokens. |
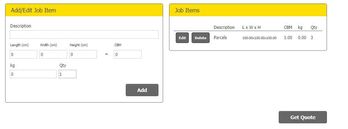
| The bottom section of the Job booking page is to input details of the load to be delivered. It is a requirement to have at least one package. Fill in the description of the goods to be transported, approximate measurements, weight and quantity then click on the Add Button, this information will then be displayed under Job Items on the right. Once all has been filled out click on the Get Quote button to progress to the next page. If there are any missing required details they will be highlighted and you will be asked to correct these details before progressing |
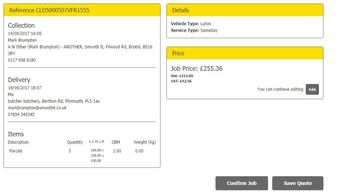
| Once the quote has been successfully entered you will be shown a summary of the details with a quote price. If any of the details are incorrect or if you wish to make a change then you can click on the Edit button to go back to the previous page. If all the details are correct then you can either click on the Save Quote button to save this Job as a Quote for later, or click on the Confirm Job button to install the Job. |
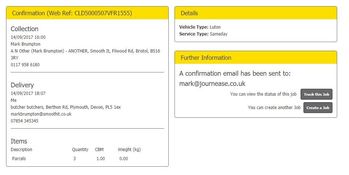
| Once you Confirm a Job you will be shown the confirmation screen and an email will be sent to your email address with tracking number and confirmation details. An email is also sent to the registered default email address in Journease to inform them that a job has been created via Delivery Booker. |
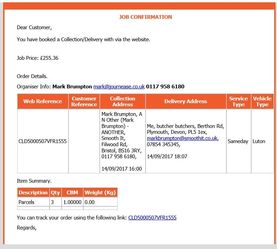
| An example of the Email sent out once a Job has been booked showing Job details and Tracking number |
Job Viewing and Tracking
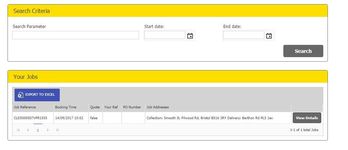
| Clicking on the View Jobs box will take you to the list of Jobs for the current logged in customer. The top section allows you to perform a detailed search for a specific Job. The lower section shows a list of all Jobs both Active and Completed. From here you can export the list to Excel for your records. Clicking on the View Details button will take you to the Job details page shown below |
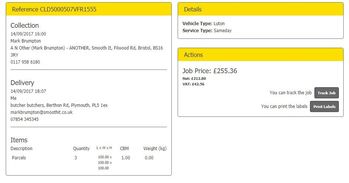
| This Job details page is similar to the confirmation screen that was shown when creating the Job but this time the buttons have changed to allow you to print labels for the Job or Track the Job. |
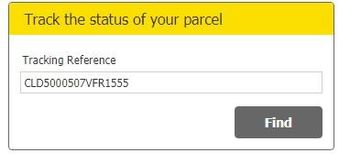
| When you click on the Tracking Widget you will be presented with the dialogue box shown, simply put in the Tracking number, which will have been sent to you via email when you booked the Job, and click Find |
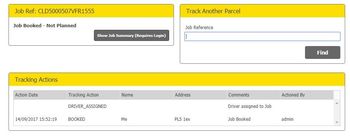
| This will open the page as shown here. You can see a brief outline of the Job and track its last known position. Here you are able to show the Job Summary which will take you to the above Job Viewing page (third picture in the above section) or track another package. |
Registering New Customers
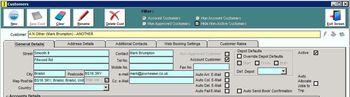 | In Journease go to the Customer screen for the customer you are registering. Note that in order for web booking to work this customer MUST have a validated post code on their address. |
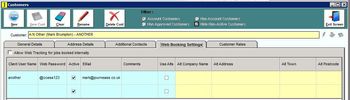 | Click on the Web Booking Settings Tab, here you can add a username and Password for this customer, It is also possible for this customer to have multiple user logins for the same account. |
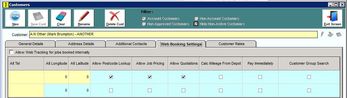 | Scroll to the end of the line and you will find setting tickboxes for this customer:-
|
Job Import Facility (This is an optional addon for delivery booker and will require setting up by Journease Staff before it can be used)
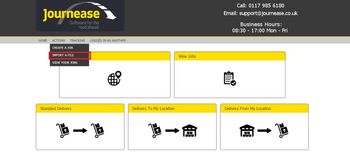
| Once a customer has logged in on Delivery Booker, they can open the Actions menu and select Import A File. |
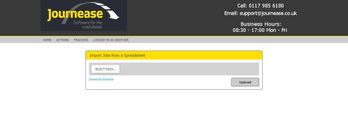
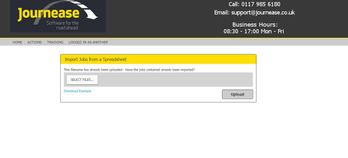
| On this next screen they will be able to select a file for upload. Each Delivery Booker will have its own required layout for the import which will be created when the import facility is set up. As the import file is specific to your company it is important that your customers first use the Download Example link which will provide them with an xlsx sheet to use. We recommend that your customers download this file on a regular basis as any changes to the import file will prevent older files from importing |
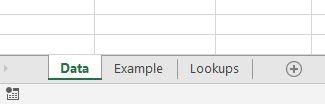
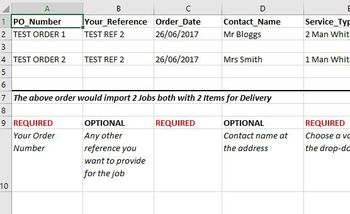
| In the xlsx file the Data tab is where they can enter their Job information to import. It is important to fill in the required fields, and is recommended to fill in as much of the other information as possible. |
| Clicking on the Example tab will show them an example of how to fill the Data and will also give them an indication of which fields are required. Not filling in a required field will cause the upload to fail. (see Possible Import Errors below). |
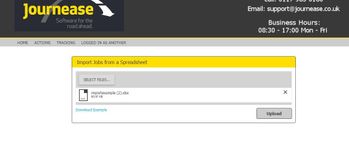
| Once an import file has been populated you can click on the Select Files button and navigate to the file that you wish to upload. Once the filename shows in the middle box click on Upload. |
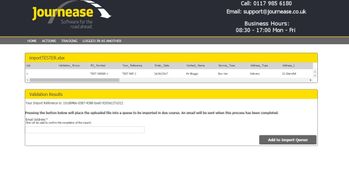
| The file will be validated to ensure that all fields contain the correct information type and that all required fields have been filled out. Once validation is complete the middle section will now show a line from the import file. There is a section below where you can add an email address, this will be used to send a confirmation email once the file upload has completed. Next click on Add to Import Queue which will add your file to the queue of files waiting to be imported. |
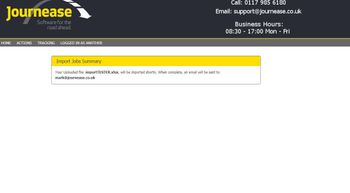
| You will be presented with a window to say that the import has been added to the queue, this can take up to ten minutes and a confirmation email will be sent once complete. |
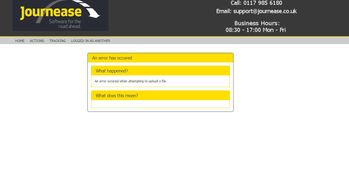
Possible Import Errors
| This error occurs when the connection with the upload server is broken. Try again in a few minutes, if the problem persists then contact Journease support |
| This error will show if you have already uploaded a file with this filename, this is a check to ensure that you don't upload the same jobs more than once. Ensure that your upload file has an updated name (e.g. follow the standard name with todays date) |
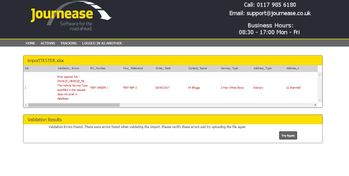
| This error occurs when validation has failed, the top box will show in RED and will tell you which data field is incorrect. Ensure that the correct data is entered in this column on the import file. |
| If your import file has incorrect column headings or is in the wrong order for import you will see this error message. Download the latest example (Download Example link) and transfer your data into the updated version, then try to import again |

Update
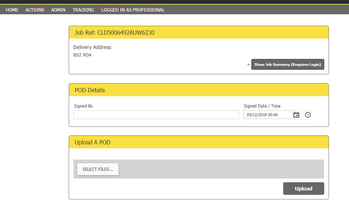
| There is now the ability for a Journease user to log into Delivery Booker, which will enable them to see ALL jobs regardless of customer, and also have the ability to upload scanned documents as PODs to attach to a job. The only Criteria necessary for this is that their Journease User name CANNOT have any spaces in it, and their Journease Password must be at least 8 characters long. Simply go to the Delivery Booker log in page and enter your Journease log in details. If there isn't a current user in Delivery Booker then one will be created using these details. Should you get an error when logging in that says "Name [name] is already in use" then this means that the user name has already been allocated to a customer. A different user name will have to be created within Journease for that Journease User to log in. |
| To Attach a scanned POD to a job:-
|
Update
|
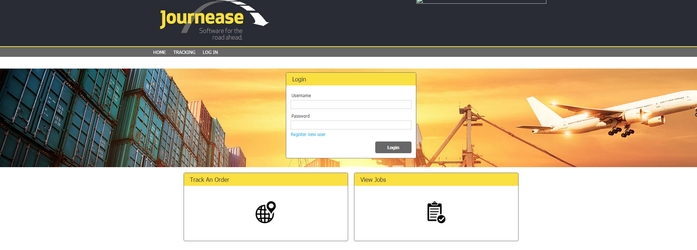
Also, with this update, came the ability to further customise your Delivery Booker main page by adding a Front Page Banner that displays behind the log in box. If this is a feature that you would like to take advantage of then contact Support@Journease.co.uk requesting the Front Page Banner and attach a relevant jpg or png image file. The size of the image file is irrelevant as the image will be anchored at the top left corner and cropped to fit the monitor that it is displayed on with a maximum height of 270px (Note:- the Image will crop not scale) Note also that as the Login box (and potentially the Quote Widget box) will appear on top of the banner, any part of the picture that needs to be seen should be put to the left or right hand side of the image - for example if the required image is a van driving down a road, don't put the van in centre of the picture as it will be obscured by the boxes. |