Depot Trunking


Fig 1

Fig 2

Fig 3

Fig 4

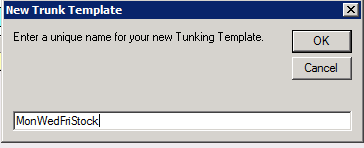
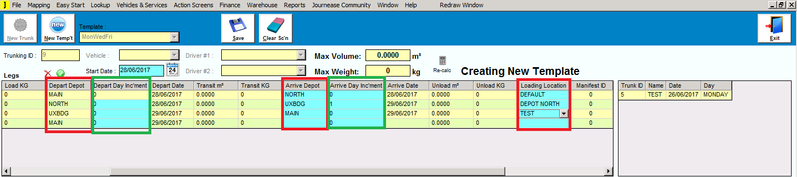
Trunking is the transportation of stock between two or more Depots, as this is a regular occurrence it is simpler to set them up as templates, then simply call the template that you need to create a trunk from each time it is needed.

Clicking on New Temp't will open the dialogue box shown in Fig 1 where you can enter a Unique name for your template, then click Save to save the name and allow you to set up the Trunking Template

Input the Depart Depot, Arrive Depot and Depot Locations that the trunk is going to cover (red sections of Fig 2), Arrival day and depart day increments will add the set number of days between each depot visit (green sections of Fig 2), this could be used for example if the company does not operate over a weekend but the trunk is set to depart Friday PM, you can add 2 days on the subsequent Arrival Day to show that it will arrive at the next Depot on the Monday.

Click Save to save the Template.

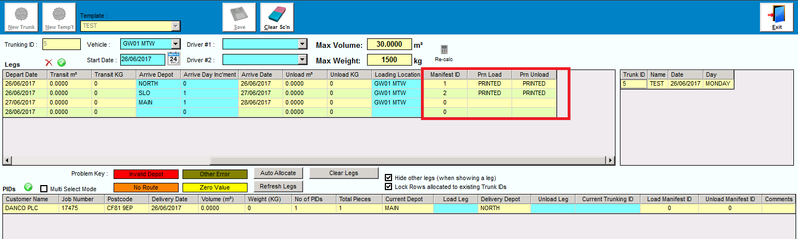
Once a template has been set up we can call it and give it a Trunking Number in order to create a Trunk from the template. The following example explains the process for running a Trunk

We have a Job booked at the North Depot, however the Stock required for the Job is located in the Main Depot. Luckily we have a Trunk travelling from the Main Depot to the North Depot which can have the product loaded for transfer.

  1. When the Job was created Journease checked stock levels and found that the stock required for the Job is in another Depot, it therefore created a Picking List for that stock at the Depot that has it
  2. Once the Stock has been Picked it is ready to be loaded onto the trunk
  3. On the Trunk window all stock waiting to be allocated is listed in the lower half of the window, clicking Auto Allocate will add the required stock to the relevant Trunk, But here's the clever bit, It will automatically detect on which leg of the trunk the stock is required and will create a loading order for each leg so that when loaded the Trunk vehicle can use Last on / First off at each of its Depots
  4. Once auto allocate has been done click Manifest ID to create a new ID, we can then click on Prn Load to print the loading manifest for this leg of the Trunk.
  5. Once the leg of the Trunk has been completed click on Prn Unload to print out the Unloading manifest for the location showing the employee which items need to be moved and scanned into the new location.
  6. Another clever addition is that once the stock item has been scanned to go onto a Trunk and the times for the Trunk arrival at the Depot that created the Job are known, Journease will mark the Job in question as being available to Trip from this time/date, allowing you to update the customer on prospective delivery times.

Manually adding Items to a Trunk

  1. Select the Trunk Template (if available) or create a new Trunk
  2. Select the New Trunk ID from the right hand pane
  3. Decide which leg of the Trunk you wish to add the item to (items awaiting trunk are displayed in the lower section) 
  4. Enter the leg number in the Load Leg field of the Item (This will add the Item to the manifest for that leg)
  5. Click Save
  6. A Manifest can now be printed in the normal way

Once the item has been scanned to the correct Loading Location for that leg, the item will disappear from the lower screen.

TroubleShooting

In order for Items to display in the lower section as awaiting Trunk

  • A job needs to be created with the product requirement in one depot, but the products are located in another
  • The Job Status has to be entered on the Job to show that the Job has been booked
  • Items need to be in a Warehouse Location (not offsite or customer location)